
Embarking on a roof replacement or installation project can be daunting, especially with all the unfamiliar terminology. As you begin your research or talk to contractors, one term that will come up frequently is the “roofing square.”
While it may seem like just another technical term, understanding what a roofing square is and how it applies to your roof can save you money, make project planning easier, and help you communicate more effectively with contractors.
Let’s explore what a roofing square is, how it’s calculated, why it’s so crucial to your roofing budget, and how to use this knowledge to make the most informed decisions for your home.
1. The Basics: What is a Roofing Square?
In the roofing industry, a “roofing square” is the standard unit of measurement used to determine the size of a roof. One roofing square equals 100 square feet of roof surface area.
It’s a useful measurement that helps contractors easily calculate how much material is required for a project. If your contractor mentions that your roof needs 25 squares of shingles, it means they’ll need enough materials to cover 2,500 square feet.
Roofers rely on this unit of measurement because it simplifies the planning and estimation process. Regardless of the type of material being used—whether it’s shingles, tiles, or metal panels—the size of your roof in squares directly impacts the quantity of materials required and, consequently, the project’s overall cost.
Knowing your roof’s measurement in squares can empower you to manage your project more confidently.
2. Why Understanding Roofing Squares Benefits You
For homeowners, understanding roofing squares can be a game-changer. It clarifies the project’s scale, enabling you to anticipate costs accurately and feel in control when discussing estimates with contractors.
Knowing the concept also makes it easier to compare quotes, understand why certain costs are applied, and potentially negotiate a more favorable deal.
Moreover, when you understand roofing basics, you can ask better questions, recognize if something doesn’t seem right, and ensure you’re not overcharged for labor or materials.
Contractors also appreciate clients who have a basic understanding of the project’s scope, as it helps streamline communication and allows for a smoother overall process.
3. How to Calculate Roofing Squares
Calculating roofing squares isn’t as straightforward as measuring your home’s square footage. The roof has its own dimensions, often larger than the home’s footprint due to its slope, overhangs, and architectural features. Here’s how to go about estimating roofing squares.
1. Determine Your Home’s Footprint
Start by calculating the footprint of your home, which is the area covered by the foundation. Measure the length and width of your home, then multiply these numbers to get the base area. This provides a rough estimate that serves as a foundation for further calculations.
Example Calculation:
If your home measures 50 feet in length and 30 feet in width, multiply those numbers:
- Length (50) x Width (30) = 1,500 square feet.
This base figure doesn’t account for the roof’s pitch or architectural elements, so it’s just a starting point.
2. Adjust for Roof Pitch and Complexity
Roof pitch, or slope, is a crucial factor in determining the actual surface area of your roof. A steeply sloped roof will have a larger surface area than a flat or low-sloped roof, even if both cover the same foundation area.
Additionally, complex designs—such as those with dormers, gables, or valleys—require more materials due to the increased surface area.
To account for pitch and complexity, contractors use multipliers based on the roof’s characteristics:
- Low slope (walkable): Multiply the footprint by 1.3.
- Moderate slope with some complexity: Multiply the footprint by 1.4.
- Steep or complex roof: Multiply the footprint by 1.6.
Using our example home footprint of 1,500 square feet with a moderate slope: 1,500 x 1.4 = 2,100 square feet.
This adjusted figure represents the approximate surface area of your roof.
3. Convert Square Footage to Roofing Squares
Now that you have the total square footage of your roof, convert it to roofing squares by dividing the surface area by 100.
Example Calculation:
2,100 ÷ 100 = 21 roofing squares.
Most roofing materials are sold in full squares, so your contractor would estimate based on needing 21 roofing squares.
4. Why Roofing Squares Impact Your Costs
Roofing squares aren’t just numbers on paper—they’re a fundamental factor in your project’s overall cost. Here’s how roofing squares influence various aspects of your roofing budget:
1. Material Costs
The number of roofing squares directly affects the cost of materials, as most roofing materials (shingles, underlayment, tiles) are priced by the square. If you have a 21-square-foot roof, your contractor will need 21 squares’ worth of materials.
For example, one roofing square of asphalt shingles typically requires three bundles. So for a 21-square roof, you’d need around 63 bundles.
2. Labor Costs
Larger roofs require more labor, which means a greater cost for installation. The total roofing squares and the roof’s complexity often dictate labor expenses.
Contractors calculate labor hours based on the roof’s size and whether additional support, safety gear, or team members are required for complex or steeply pitched roofs.
3. Dump Fees for Tear-Off Projects
If your project involves tearing off an old roof, the number of roofing squares influences disposal costs. Dump fees are typically calculated based on the weight of discarded materials, so the more squares, the more material that needs to be removed, and thus, the higher the disposal cost.
5. Additional Factors That Affect Your Roofing Budget
While knowing your roof’s size in squares is crucial, other considerations can impact the overall price tag of your project:
Material Choice
Different roofing materials can understandably vary when it comes to their price points. Asphalt shingles are often the most affordable, while tile, metal, and specialty materials can cost significantly more.
Your choice of material will affect the price per square, so choosing something that fits your budget and your home’s needs is essential.
Roof Accessibility
If your roof is difficult to access—perhaps due to landscaping, nearby trees, or surrounding structures—it may increase labor costs.
Challenging access often requires more setup time, additional safety equipment, or specialized techniques, which can increase the time and expense of the project.
Permits and Codes
In many areas, roofing projects require permits, and your city or county may have specific building codes for roofing that affect your options or installation methods.
For example, some regions have regulations on wind resistance, energy efficiency, or specific materials that can be used. Permits and compliance can add to the cost but are essential for a safe, code-compliant roof.
Warranties
Some homeowners choose to pay for extended warranties on materials or workmanship. Extended warranties can provide peace of mind but may come at a higher upfront cost. Be sure to ask your contractor about any available warranty options and understand what they cover.
6. Tips for Working with Roofing Contractors
Equipped with your understanding of roofing squares, you’re now better prepared to collaborate with roofing contractors. Here are some tips to make the process smoother:
1. Get Multiple Quotes
It’s wise to gather estimates from 3 to 4 reputable roofing contractors. Compare their pricing, timelines, and warranties to find the best fit for your budget and goals.
With your knowledge of roofing squares, you’ll be able to ask informed questions and clarify any uncertainties in their calculations.
2. Ask About Waste Calculations
Waste is inevitable in roofing projects, as cutting materials to fit a roof’s shape and trimming around features like chimneys or skylights leads to leftover material.
Contractors often add a waste factor, typically 10-15%, to ensure they have enough material. Ask each contractor how they handle waste calculations to understand if it’s factored into their estimates.
3. Request Itemized Estimates
An itemized estimate breaks down costs for materials, labor, and disposal. It provides transparency and helps you understand each component’s cost.
This approach also allows you to see if any elements, like waste disposal or steep slope charges, are adding unexpected expenses.
4. Verify Material Quality
If you’re investing in high-quality roofing materials, confirm that the contractor will be using them as specified. Lower-grade materials may cut initial costs but might not last as long, affecting the overall lifespan and reliability of your roof.
7. Common Questions About Roofing Squares
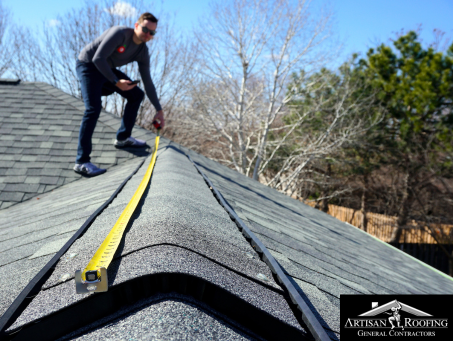
Q: Can I measure my roof?
A: While possible, measuring a roof can be challenging and dangerous, especially if you have a steep slope or complex design. Many homeowners rely on professionals for accurate and safe measurements.
Q: What if my home’s square footage is similar to my roof’s square footage?
A: The roof’s surface area is often larger than the home’s footprint due to its pitch and architectural details. Using your home’s square footage as an estimate can provide a ballpark figure but may not be accurate.
Q: Can I use an online calculator?
A: Some roofing websites offer calculators for estimating roofing squares based on home size and roof pitch. These tools can be useful, but they’re not always 100% accurate.
Final Thoughts: Roofing Squares and Project Planning
Understanding roofing squares can be invaluable as you plan your roofing project. This knowledge allows you to approach the process with confidence, anticipate costs, and communicate effectively with contractors.
By grasping the basics of roofing squares and related expenses, you’ll have a more transparent and satisfying experience—and possibly save money along the way.
When you’re ready to take the next step, reach out to a reputable contractor like Artisan. Our team offers thorough inspections, accurate estimates, and a commitment to quality work that lasts.